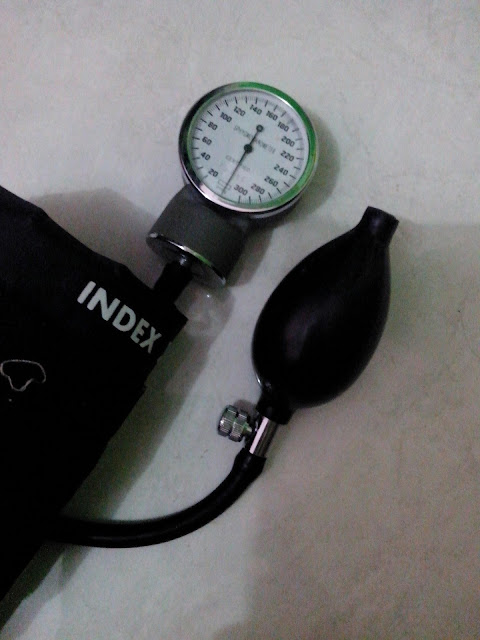
• How Stethoscope Works....

    A stethoscope is a medical device for listening to sounds inside the body. The initial stethoscope was invented in the early 19th century by French physician Ren� Laennec, but was actually trying to achieve a rather different end: doctor-patient distance....

  • Care Plan For Decreased Cardiac Output...

    Nursing diagnosis for decreased cardiac output may be related to altered myocardial contractility, inotropic changes; alterations in rate, rhythm, electrical conduction; or structural changes, such as valvular defects and ventricular aneurysm. ...

  • ECG Waveforms And Components

    The electrocardiogram (ECG) is a graphic recording ofelectric potentials generated by the heart.The signals are detected by means of metal electrodes attached to the extremities and chest wall and are then amplified and recorded by the electrocardiograph. ECG leads actually display the instantaneous differences in potential between these electrodes. ...

Showing posts with label nursing procedures. Show all posts

Sunday, June 22, 2014

Selection of Phlebotomy Venipuncture Site

Antecubital vein location varies slightly from person to person; however, two basic vein distribution arrangements referred to as the “H-shaped” and the “M-shaped” patterns are seen most often. The “H-shaped” pattern is so named because the most prominent veins in this pattern- the cephalic, cephalic median, median basilic, and basilic veins- are distributed on the arm in a way that resembles a slanted H. The most prominent veins of the M pattern- the cephalic, median cephalic, median basilic, and basilic veins- resemble the shape of an M. The H-shaped pattern is seen in approximately 70% of the population.
Factors in Vein Selection: Select the vein carefully. The brachial artery and several major nerves pass through the antecubital area. Accidental artery puncture and nerve injury are risks of venipuncture. Prioritizing veins can minimize the potential for accidental arterial puncture and nerve involvement. Typically, a tourniquet is used to aid in the selection of a vein unless specific tests require that a tourniquet not be used. A tourniquet is not necessary if veins are large and easily palpated. However, if only the basilic vein is visible without a tourniquet, one must be applied so the availability of safer veins (e.g. median and/or cephalic) can be assessed. Palpation is usually performed using the index finger. The collector’s thumb should not be used to palpate because it has a pulse beat. In addition to locating veins, the palpation pressure helps to differentiate veins from arteries, which pulsate, are more elastic, and have a thick wall.
Accidental Arterial Puncture: If during the procedure accidental arterial puncture is suspected (e.g. rapidly forming hematoma, rapid filling tube, and bright red blood), discontinue the venipuncture immediately. Remove the needle and apply direct forceful pressure to the puncture site for a minimum of 5 minutes until active bleeding has ceased. The nursing staff and physician must be notified and the incident documented according to institutional policy.
Consult with supervisory personnel to determine the suitability of the suspected arterial specimen for testing. If the specimen is acceptable it must be annotated that the specimen was an arterial specimen. In some cases different normal reference intervals are assigned to arterial blood. This information must be conveyed to the caregiver through Meditech Specimen Collection comment and Test Result comments.
Nerve Injury: If the patient feels a shooting, electric-like pain, or tingling or numbness proximal or distal to the venipuncture site, terminate the venipuncture and remove the needle immediately. Repeat the venipuncture in another site with a new sterile needle if needed. Document the incident and direct the patient to medical evaluation if indicated.
Read More

Friday, June 20, 2014

Correcting Urinary Incontinence With Bladder Retraining

The incontinent patient typically feels frustrated, embarrassed, and hopeless. Fortunately, his problem can usually be corrected by bladder retraining—a program that aims to establish a regular voiding pattern. Follow these guidelines.
Assess elimination patterns
First, assess the patient's intake and voiding patterns and reason for each accidental voiding (such as a coughing spell). Use an incontinence monitoring record.
Establish a voiding schedule
Encourage the patient to void regularly, for example, every 2 hours. When he can stay dry for 2 hours, increase the interval by 30 minutes every day until he achieves a 3- to 4-hour voiding schedule. Teach the patient to practice relaxation techniques such as deep breathing, which help decrease the sense of urgency.
Record results and remain positive
Keep a record of continence and incontinence for about 5 days to help reinforce the patient's efforts to remain continent. Remember, both your own and your patient's positive attitudes are crucial to his successful bladder retraining.
Take steps for success
Here are some additional tips to boost the patient's success:
  • Be sure to locate the patient's bed near a bathroom or portable toilet. Leave a light on at night. If the patient needs assistance getting out of bed or a chair, promptly answer the call for help.
  • Teach the patient measures to prevent urinary tract infections, such as adequate fluid intake (at least 2,000 ml/day unless contraindicated), drinking cranberry juice to help acidify urine, wearing cotton underpants, and bathing with nonirritating soaps. If the patient has urge incontinence, cranberry juice is contraindicated.
  • Encourage the patient to empty his bladder completely before and after meals and at bedtime.
  • Advise him to urinate whenever the urge arises and never to ignore it.
  • Instruct the patient to take prescribed diuretics upon rising in the morning.
  • Advise him to limit the use of sleeping aids, sedatives, and alcohol; they decrease the urge to urinate and can increase incontinence, especially at night.
  • If the patient is overweight, encourage weight loss.
  • Suggest exercises to strengthen pelvic muscles.
  • Instruct the patient to increase dietary fiber to decrease constipation and incontinence.
  • Monitor the patient for signs of anxiety and depression.
  • Reassure the patient that periodic incontinent episodes don't mean that the program has failed. Encourage persistence, tolerance, and a positive attitude.
Read More

Wednesday, June 18, 2014

Phlebotomy Venipuncture Procedure : Guidelines to Prioritizing Draws

Specimen Priority:
“The urgency that the healthcare provider wants the specimen collected/run determines that order’s priority. We have three specimen priorities:
A. STAT (S) – this priority means that the order is to be collected and run right away, without delay. This status is used most often in emergency situations and should be the first specimens collected.
B. URG (U) – this is the urgent specimen priority and it is to be collected as soon as possible but not before a STAT. Urgent specimens are the middle priority, meaning they are important to be done quickly but not absolutely critical (i.e. STAT)
C. ROUTINE (R) – this is the lowest specimen priority. Routine specimens should be collected when you can but not before a STAT or URG.
- The last thing to understand about specimen priority is the concept of Timed Orders. Any one of the above three priorities may be ordered for a specific time of the day to be collected (i.e. URG for 2000 or ROUTINE for 2359). These are called TIMED ORDERS. When a specimen is requested for a specific time then the priority is superceded and the specimen should be collected at the requested time. All STAT and URG specimens (regardless of what time they are ordered for) go into their respective Collection Category (STAT or URG, see above). If a specimen is ordered as a ROUTINE priority for a specific time, it will go into that specific Collection Category time (i.e. 0830 or 1600). If a
specimen is ROUTINE priority and DOES NOT have a specific time requested it will go into the POOL Collection Category. Any specimens in the POOL Collection Category are of the lowest urgency, to be collected whenever you have time.”
NOTE: STATS and TIMED ORDERS are to be collected within a 15 minute window (15 minutes before
or after the ordered time). It is encouraged that these specimens are received in the laboratory within 15
minutes of being drawn.

 
Read More

Wednesday, June 11, 2014

Phlebotomy Venipuncture Procedure : Assembly of Supplies/ Safety

All needles and syringes must be taken out of the original package in the patient’s presence. Never
preassemble the vacutainer apparatus with a needle prior to use.
1. Vacutainer Eclipse
a. Holding both colored shields, twist and remove white shield (end to be screwed into holder).
b. Screw in holder.
c. Rotate safety shield back out of way.
2. Syringe Draw
a. Open Hypodermic Needle package and remove device.
b. Attach appropriate Hypodermic Needle to syringe by twisting the needle onto the syringe.
c. When transferring the specimen to a vacutainer tube, no associate is to handle a tube at any time
with their hand while inserting the transfer needle into the vacutainer. This includes stabilizing a
tube with one’s hand, in the phlebotomy tray, while inserting the needle. The hand that is not
holding the syringe is not to aid in specimen transfer. The associate may only use their hand to
remove the vacutainer tube from the transfer needle, while pulling the vacutainer tube away from
the transfer needle and either immediately placing the needle in another tube located on the
phlebotomy tray, or immediately activating the safety shield for discard, if the specimen transfer is
complete. If the specimen cannot be successfully transferred without the need for an associate to
use their “free” hand to hold or stabilize a vacutainer tube, then a transfer hub is to be utilized.
3. Butterfly “Push Button” with a SYRINGE
a. Open Butterfly Push Button package and remove device.
b. Remove luer cap and attach syringe
3
c. Remove the clear plastic needle sheath.
4. Butterfly “Push Button” with a VACUTAINER
a. Screw multiple adaptor into vacutainer.
b. Open Butterfly Push Button package and remove device.
c. Remove colored end of multiple sample adaptor and remove luer cap to attach butterfly.
d. Remove the clear plastic needle sheath.
Read More

Tuesday, June 10, 2014

Fecal Incontinence Management

Fecal incontinence, the involuntary passage of feces, may occur gradually (as in dementia) or suddenly (as in spinal cord injury). It usually results from fecal stasis and impaction secondary to reduced activity, inappropriate diet, or untreated painful anal conditions. It can also result from chronic laxative use; reduced fluid intake; neurologic deficit; pelvic, prostatic, or rectal surgery; and the use of certain medications, including antihistamines, psychotropics, and iron preparations. Not usually a sign of serious illness, fecal incontinence can seriously impair an elderly patient's physical and psychological well-being.
Patients with urinary or fecal incontinence should be carefully assessed for underlying disorders. Most can be treated; some can even be cured. Treatment aims to control the condition through bladder or bowel retraining or other behavior management techniques, diet modification, drug therapy, pessaries, and, possibly, surgery. Corrective surgery for urinary incontinence includes transurethral resection of the prostate in men, urethral collagen injections for men or women, repair of the anterior vaginal wall or retropelvic suspension of the bladder in women, urethral sling, and bladder augmentation.
Equipment
Bladder retraining record sheet • gloves • stethoscope (to assess bowel sounds) • lubricant • moisture barrier cream • antidiarrheal or laxative suppository • incontinence pads • bedpan • specimen container • label • laboratory request form • optional: stool collection kit, urinary catheter.
Implementation
Whether the patient reports urinary or fecal incontinence or both, you'll need to perform initial and continuing assessments to plan effective interventions.
For fecal incontinence
  • Ask the patient with fecal incontinence to identify its onset, duration, severity, and pattern (for instance, determine whether it occurs at night or with diarrhea). Focus the history on GI, neurologic, and psychological disorders.
  • Note the frequency, consistency, and volume of stools passed in the past 24 hours. Obtain a stool specimen if ordered. Protect the patient's bed with an incontinence pad.
  • Assess for chronic constipation, GI and neurologic disorders, and laxative abuse. Inspect the abdomen for distention, and auscultate for bowel sounds. If not contraindicated,
    check for fecal impaction (a factor in overflow incontinence).
  • Assess the patient's medication regimen. Check for drugs that affect bowel activity, such as aspirin, some anticholinergic antiparkinsonian agents, aluminum hydroxide, calcium carbonate antacids, diuretics, iron preparations, opiates, tranquilizers, tricyclic antidepressants, and phenothiazines.
  • For the neurologically capable patient with chronic incontinence, provide bowel retraining.
  • Advise the patient to consume a fiber-rich diet that includes lots of raw, leafy vegetables (such as carrots and lettuce), unpeeled fruits (such as apples), and whole grains (such as wheat or rye breads and cereals). If the patient has a lactase deficiency, suggest that he take calcium supplements to replace calcium lost by eliminating dairy products from the diet.
  • Encourage adequate fluid intake.
  • Teach the elderly patient to gradually eliminate laxative use. Point out that using laxatives to promote regular bowel movement may have the opposite effect, producing either constipation or incontinence over time. Suggest natural laxatives, such as prunes and prune juice, instead.
  • Promote regular exercise by explaining how it helps to regulate bowel motility. Even a nonambulatory patient can perform some exercises while sitting or lying in bed.
Special considerations
  • For fecal incontinence, maintain effective hygienic care to increase the patient's comfort and prevent skin breakdown and infection. Clean the perineal area frequently, and apply a moisture barrier cream. Control foul odors as well.
  • Schedule extra time to provide encouragement and support for the patient, who may feel shame, embarrassment, and powerlessness from loss of control.
Complications
Skin breakdown and infection may result from incontinence. Psychological problems resulting from incontinence include social isolation, loss of independence, lowered self-esteem, and depression.
Documentation
Record all bladder and bowel retraining efforts, noting scheduled bathroom times, food and fluid intake, and elimination amounts, as appropriate. Document the duration of continent periods. Note any complications, including emotional problems and signs of skin breakdown and infection as well as the treatments given for them.
Read More

Monday, June 9, 2014

Supplies and Use of Supplies for Phlebotomy Venipuncture Procedure

By establishing a procedure for the correct collection of blood by venipuncture many pre-
analytical errors and patient management complications can be avoided. Patient safety is the ultimate goal above all other considerations. Cost, efficiency, etc are secondary to ensuring that in no way will the patient be harmed by the phlebotomy procedure. This includes all aspects of the procedure including ordering, drawing, labeling, handling and transporting the specimen. The quality of the patient results is directly dependent upon the quality of the specimen. By providing the highest standard of safety and quality of care customer service satisfaction can be achieved.
Supplies and use of supplies –(Refer to Standard Phlebotomy Tray policy)
1. Blood Collecting Trays
- Blood collecting trays should be lightweight and easy to handle with enough space and compartments for the various supplies.
2. Gloves
- Disposable latex, vinyl, polyethylene, or nitrile gloves provide barrier protection and must be worn for all venipuncture procedures to comply with OSHA regulations.
Latex free gloves must be worn for all patients with a hypersensitivity to latex proteins.
3. Hubs
a. All Vacutainer holders are to be SINGLE USE.
OSHA states “Blood tube holders, with needle attached, must be immediately discarded into an accessible sharps container after safety feature has been activated”. The re-use of vacutainer blood tube holders is strictly prohibited by OSHA and BVHS. (According to OSHA, “removing contaminated needles and re-using blood tube holders can expose workers to multiple hazards.”
b. Specimen transfer hubs are also available and, for our safety, are to be used before attempting to use a transfer needle. To use this device, simply attach it to the syringe and place the/each necessary vacutainer tube in the in the vacutainer holder until the appropriate amount of specimen is transferred.
4. Needles
- A large gauge (G) number indicates a small needle, while a small gauge number indicates alarge needle.
Needles must always be sterile and should never be recapped.
In order to prevent potential worker exposure, the needle safety feature should be activated immediately after specimen collection and discarded without disassembly into a sharps container. Needles are single use only.
a. BD Hypodermic needles
b. Butterfly “Push Button”
5. Sterile Syringes
-Sterile syringes must remain sterile. If removed from their container and not used immediately they are no longer considered sterile and are not to be used.
6. Blood Collection Tubes
- Venous blood collection tubes are manufactured to withdraw a predetermined volume of blood.
7. Tourniquets
-Tourniquets must be discarded immediately when contamination with blood or body fluids is obvious or suspected. Before drawing any in-patients, be sure to look around the room,
typically next to the sharps container, for a tourniquet that is specific for that patient. Out-patient draws and off-site tourniquets are replaced daily, or upon any sign of obvious or suspectedcontamination.
8. Antiseptics
- 70% isopropyl, PVP iodine prep pads, or 2% Iodine Tincture.
9. Gauze Pads
-Small, gauze pads should be available. Cotton balls may also be used.
10. Puncture-Resistant Disposable Container
-An approved puncture-resistant disposable container that is compliant with national or local regulations must be available for the disposal of the contaminated needle assembly. Such containers typically have a color regulated by each country, and a biohazard symbol.
11. Ice
-Ice or refrigerant should be available for specimens that require immediate chilling.
12. Bandages/Tape
- Adhesive bandages, preferably hypoallergenic, should be available, as well as gauze wraps for sensitive or fragile skin.
13. Warming Devices
- Warming devices may be used to dilate blood vessels and increase flow. When using commercial warmers follow the manufacturer’s recommendation. Warming devices should not exceed 42º C.
14. Specimen Collection Manual/Reference Lab Manual
- A test manual listing the tube(s) and volume requirements for various tests, specimen handling instructions, and precautions is available on all computers.
Read More

Saturday, June 7, 2014

Urinary Incontinence Management

In elderly patients, incontinence commonly follows any loss or impairment of urinary or anal sphincter control. The incontinence may be transient or permanent. In all, about 10 million adults experience some form of urinary incontinence; this includes about 50% of the 1.5 million people in extended-care facilities. Fecal incontinence affects up to 10% of the patients in such facilities.
Contrary to popular opinion, urinary incontinence is neither a disease nor a part of normal aging. Incontinence may be caused by confusion, dehydration, fecal impaction, or restricted mobility. It's also a sign of various disorders, such as prostatic hyperplasia, bladder calculus, bladder cancer,
urinary tract infection (UTI), stroke, diabetic neuropathy, Guillain-Barrè syndrome, multiple sclerosis, prostatic cancer, prostatitis, spinal cord injury, and urethral stricture. It may also result from urethral sphincter damage after prostatectomy. In addition, certain drugs, including diuretics, hypnotics, sedatives, anticholinergics, antihypertensives, and alpha antagonists, may trigger urinary incontinence.
Urinary incontinence is classified as acute or chronic. Acute urinary incontinence results from disorders that are potentially reversible, such as delirium, dehydration, urine retention, restricted mobility, fecal impaction, infection or inflammation, drug reactions, and polyuria. Chronic urinary incontinence occurs as four distinct types: stress, overflow, urge, and functional incontinence.
In stress incontinence, leakage results from a sudden physical strain, such as a sneeze, cough, or quick movement. In overflow incontinence, urine retention causes dribbling because the distended bladder can't contract strongly enough to force a urine stream. In urge incontinence, the patient can't control the impulse to urinate. Finally, in functional (total) incontinence, urine leakage occurs despite the fact that the bladder and urethra are functioning normally. This condition is usually related to cognitive or mobility factors.
Equipment
Bladder retraining record sheet ; gloves; stethoscope (to assess bowel sounds) ; lubricant ; moisture barrier cream ; antidiarrheal or laxative suppository ; incontinence pads ; bedpan ; specimen container ; label ; laboratory request form ; optional: stool collection kit, urinary catheter.
Implementation
Whether the patient reports urinary or fecal incontinence or both, you'll need to perform initial and continuing assessments to plan effective interventions.
For urinary incontinence
  • Ask the patient when he first noticed urine leakage and whether it began suddenly or gradually. Have him describe his typical urinary pattern: Does he usually experience incontinence during the day or at night? Does he get the urge to go again immediately after emptying the bladder? Does he get strong urges to go? Ask him to rate his urinary control: Does he have moderate control, or is he completely incontinent? If he sometimes urinates with control, ask him to identify when and how much he usually urinates.
  • Evaluate related problems, such as urinary hesitancy, frequency, urgency, nocturia, and decreased force or interrupted urine stream. Ask the patient to describe any previous treatment he has had for incontinence or measures he has performed by himself. Ask about medications, including nonprescription drugs.
  • Assess the patient's environment. Is a toilet or commode readily available, and how long does the patient take to reach it? After the patient is in the bathroom, assess his manual dexterity; for example, how easily does he manipulate his clothes?
  • Evaluate the patient's mental status and cognitive function.
  • Quantify the patient's normal daily fluid intake.
  • Review the patient's medication and diet history for drugs and foods that affect digestion and elimination.
  • Review or obtain the patient's medical history, noting especially the number and route of births, hysterectomy (in women), and any incidence of UTI, prostate disorders, diabetes, spinal injury or tumor, stroke, and bladder, prostate, or pelvic surgery. Assess for such disorders as delirium, dehydration, urine retention, restricted mobility, fecal impaction, infection, inflammation, and polyuria.
  • Inspect the urethral meatus for obvious inflammation or anatomic defects. Have the female patient bear down while you note any urine leakage. Gently palpate the abdomen for bladder distention, which signals urine retention. Assess for costovertebral angle tenderness. If possible, have the patient examined by a urologist.
  • Obtain specimens for appropriate laboratory tests as ordered. Label each specimen container, and send it to the laboratory with a request form.
  • Begin incontinence management by implementing an appropriate bladder retraining program.
  • Nursing alert Obtain a 24- to 48-hour bladder diary before implementing bladder retraining.
  • To ensure healthful hydration and to prevent UTI, make sure the patient maintains an adequate daily intake of fluids (six to eight 8-oz glasses). Restrict fluid intake after 6 p.m.
  • To manage stress incontinence, begin an exercise program to help strengthen the pelvic floor muscles. (See Strengthening pelvic floor muscles.)
  • To manage functional incontinence, frequently assess the patient's mental and functional status. Regularly remind him to void. Respond to his calls promptly, and help him get to the bathroom quickly. Provide positive reinforcement.
     
Complications
Skin breakdown and infection may result from incontinence. Psychological problems resulting from incontinence include social isolation, loss of independence, lowered self-esteem, and depression.
Documentation
Record all bladder and bowel retraining efforts, noting scheduled bathroom times, food and fluid intake, and elimination amounts, as appropriate. Document the duration of continent periods. Note any complications, including emotional problems and signs of skin breakdown and infection as well as the treatments given for them.
Read More
Powered by Blogger.

Search This Blog